
This tutorial shows you how to wireframe a homepage in under five minutes using Wireframable. Crawl an existing site to pull its brand assets, or start from scratch with a prompt. Either way, you get a fully styled wireframe you can share, iterate on, and use as a starting point for the real build.
How to Wireframe a Homepage (Step-by-Step)
There are two paths depending on whether you have an existing site to reference or you are starting from nothing.
Path A: Wireframe From an Existing Website
Use this when you have a live site to pull design assets from – the client’s current homepage, a competitor, or an inspiration page.
Step 1: Create a Project and Add a URL
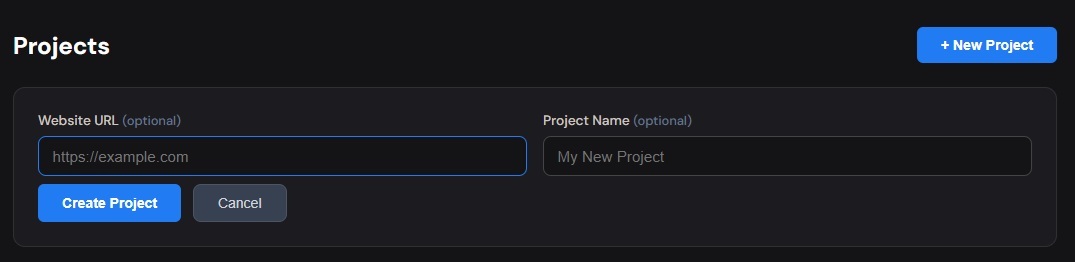
Sign in to Wireframable and create a new project with your homepage URL. This creates a design profile for that URL.
Step 2: Crawl the Page
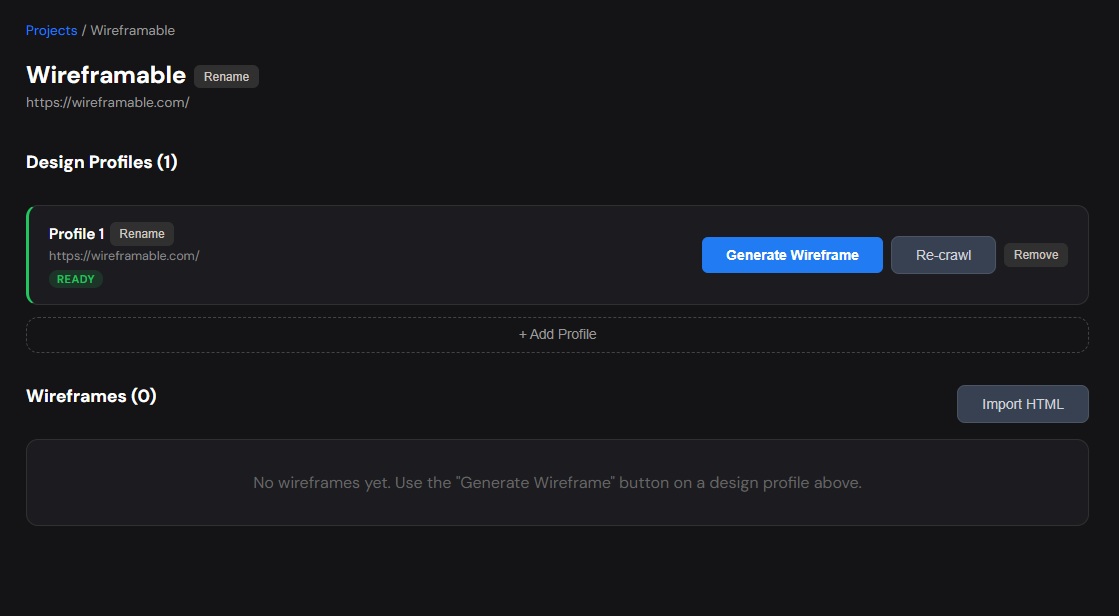
Click Crawl on the design profile. Wireframable will visit the page and extract the colors, fonts, images, and page structure. This takes a few seconds. Once the status changes to “Ready,” the profile has everything it needs.
Step 3: Configure and Generate
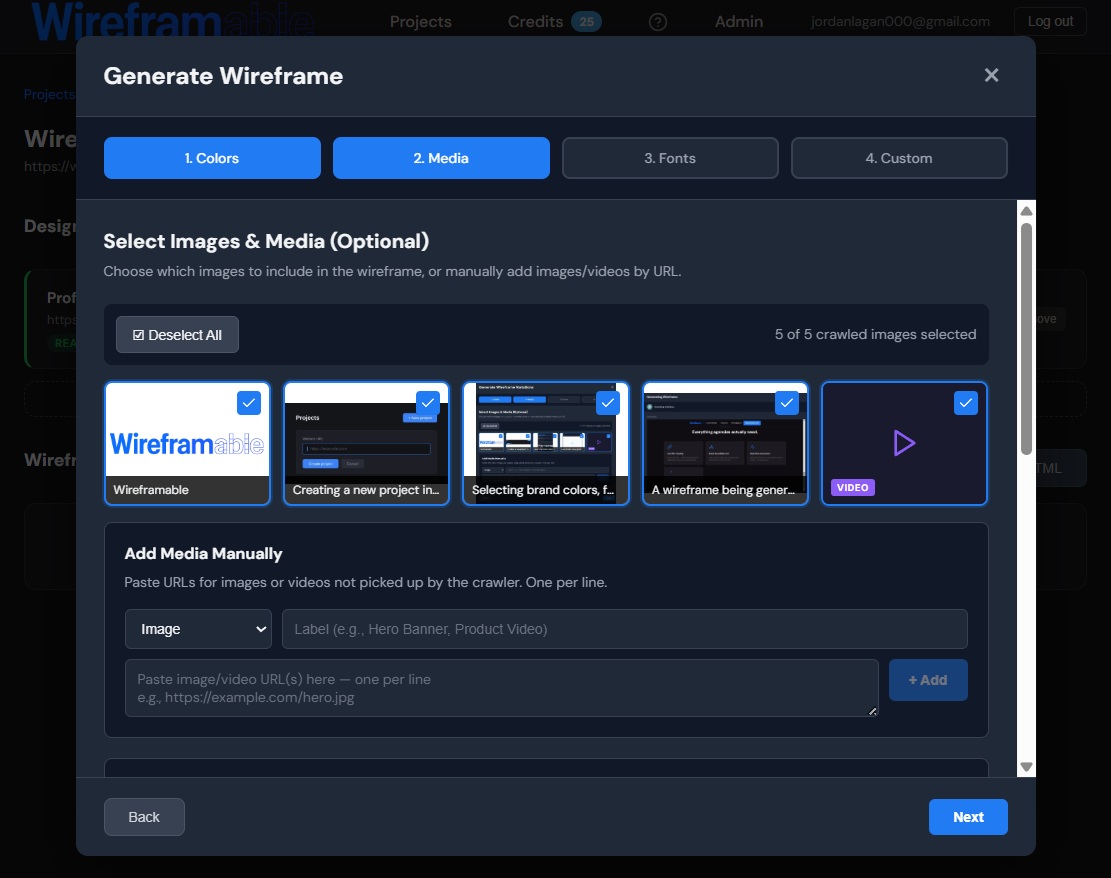
Click Generate Wireframe on the ready profile to open the 4-step configuration modal:
- Colors – the top colors from the crawl are shown. Click to select them and assign a role (Primary Background, Accent/CTA, Text, Nav/Header, etc.). You can also add custom hex codes.
- Media – images from the crawl are pre-selected. Toggle them on/off, label them (Hero Image, Logo, Product Photo), or add your own by URL.
- Fonts – detected fonts from the site. Select up to 6 and assign roles (Heading, Subheading, Body, Button). Add Google Fonts URLs or custom fonts if needed.
- Custom Prompt – optional. Guide the AI with specific instructions like “Redesign with a bolder hero and fewer nav links” or “Make it minimal with lots of whitespace.”
Click Generate with Live Preview and the AI streams the wireframe to your screen in real time.
Step 4: Preview, Share, Iterate
The wireframe appears in your project within 30-60 seconds. From there you can:
- Preview it full-screen
- Share a link with your client or team (one click, no login required for them)
- Export the raw HTML/CSS
- Regenerate with specific feedback: “Make the hero full-bleed with the product image on the right” or “Move testimonials above pricing.”
Each regeneration costs one credit (first one is free) and takes about a minute.
Path B: Wireframe a Homepage From Scratch
Use this when you are starting fresh – no existing site, no reference URL. Just an idea.
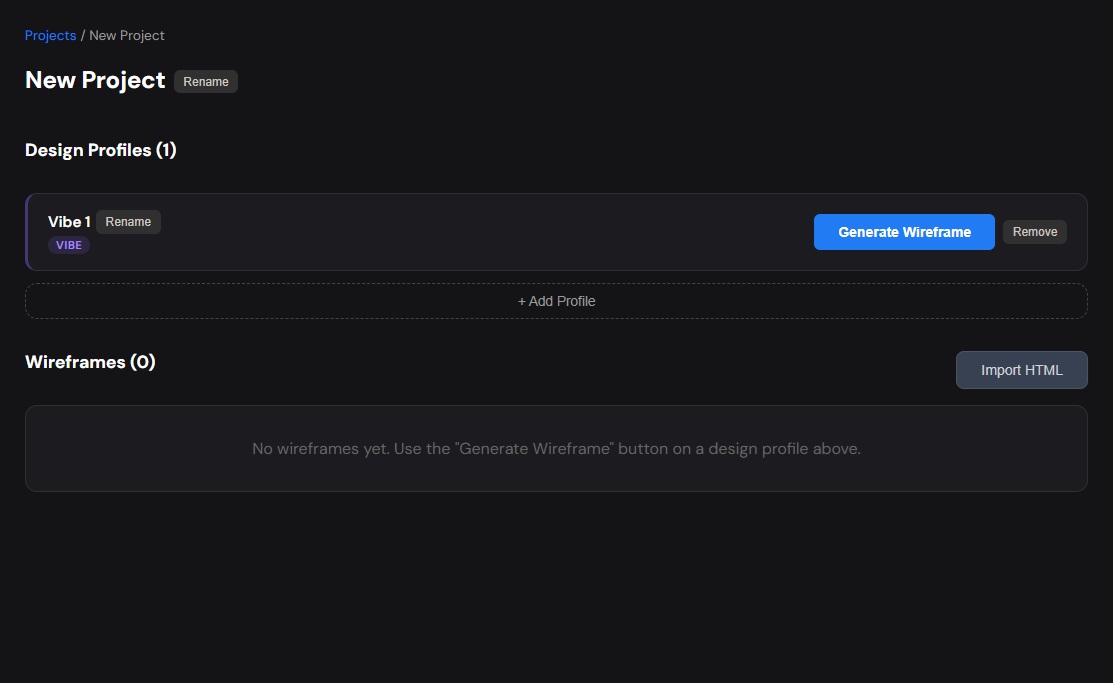
Step 1: Create a Project (No URL)
Create a new project without entering a URL. Give it a name that describes what you are building.
Step 2: Open the Config Modal
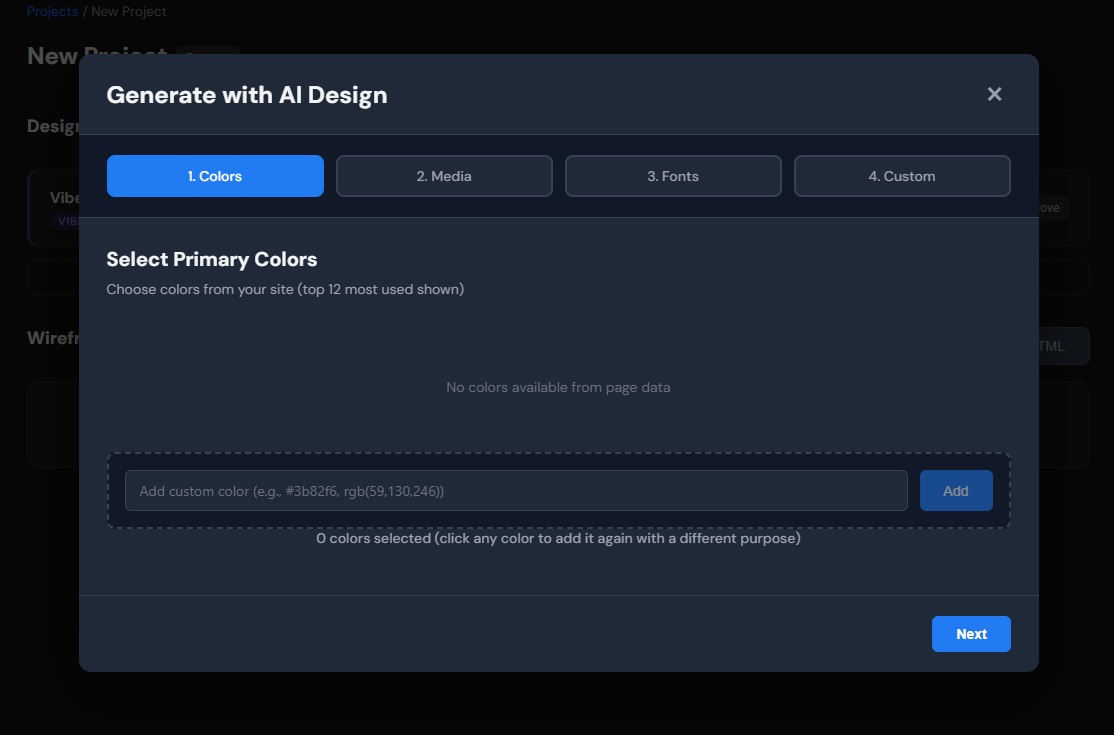
Click Generate Wireframe. Since there is no crawled data, you will add everything manually through the same 4-step modal:
- Colors – type in your brand hex codes and tag them (Primary Background, Accent/CTA, Text)
- Media – paste URLs to product images, hero photos, logos, or videos you want included
- Fonts – paste Google Fonts URLs or custom font file URLs
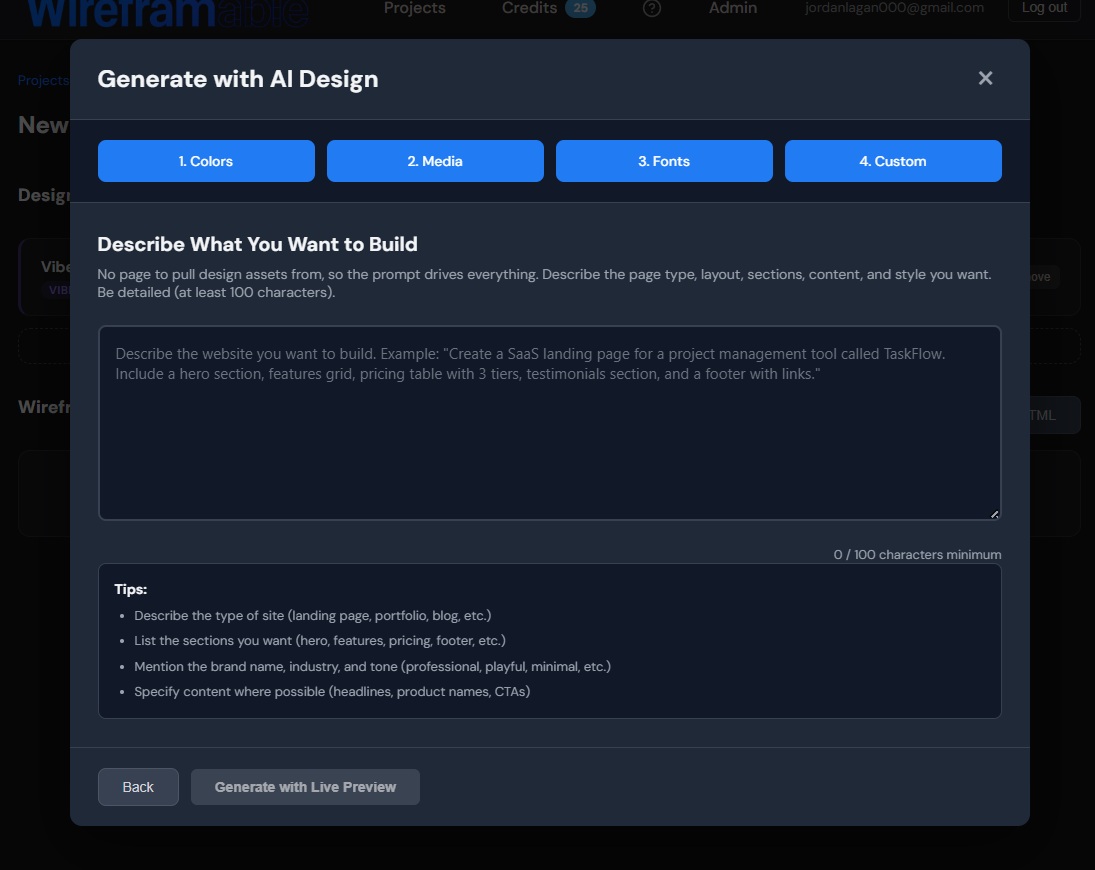
- Custom Prompt – this one is required (minimum 100 characters). It drives everything since there is no crawled page to reference.
Step 3: Write a Detailed Prompt
Since you have no crawled page, the prompt is what tells the AI what to build. The more specific, the better. For example:
“Homepage for a sustainable activewear brand. Hero section with a full-width lifestyle image and a headline about performance meets sustainability. Below that, a three-column product category grid (tops, bottoms, accessories). Then a section about materials with two side-by-side images. Social proof with customer reviews in cards. Footer with newsletter signup and social links.”
Or keep it loose if you want to explore:
“Modern SaaS homepage for a project management tool. Clean, minimal, lots of whitespace. Blue and white color scheme.”
Step 4: Generate and Explore
Click Generate with Live Preview and the AI builds a homepage wireframe based on your prompt and brand assets, streaming it to your screen in real time.
Since you are exploring from scratch, try generating a few variations with different prompts to see different layout directions before committing.
Tips for Better Homepage Wireframes
After generating hundreds of homepage wireframes, here is what I have learned about getting good results:
Be specific about section order. The AI is good at layout, but it cannot read your mind about what goes first. If you want social proof above features, say so.
Name the page type. Say “e-commerce homepage” or “SaaS landing page” or “portfolio site.” This gives the AI a mental model for what sections typically appear and in what order.
Reference a vibe, not just structure. Instead of just listing sections, describe the feeling: “editorial and spacious” or “dense and information-rich” or “luxury minimal with large photography.”
Use regeneration for refinement. The first generation is a starting point. The real value comes from the second and third iteration where you give specific feedback on what to change.
Share early. The shareable link feature lets you send a wireframe to a client or team member in seconds. Get feedback while the layout is still fluid, not after you have committed hours to a direction.
When to Use AI Wireframing vs Manual Design
AI wireframing is not a replacement for thoughtful design. It is a replacement for the blank canvas problem. Use it when:
- You need to explore multiple directions before committing to one
- You are pitching a redesign and want to show the client possibilities fast
- You are scoping a project and need a visual reference for the dev team
- A client says “I will know it when I see it” and you need to show them options without burning a full day on each one
Once a direction is chosen, you take it into Figma or directly into code and refine it. The wireframe is the conversation starter, not the final deliverable.
Frequently Asked Questions
How long does it take to generate a homepage wireframe?
About 30-60 seconds per generation. You can generate multiple variations in under five minutes.
Do I need design experience to use this?
No. If you can describe what you want in plain English and pick some colors, you can generate a professional homepage wireframe.
Can I use the generated wireframe as real code?
Yes. Every wireframe is clean HTML and CSS. You can copy it directly, hand it to a developer, or use it as a reference for building the real page.
What if I do not like the first result?
Regenerate with specific feedback. Tell the AI what to change – move sections, adjust the hero, add more whitespace. Each iteration costs one credit and takes about a minute.
What types of homepages work best?
Marketing sites, SaaS homepages, e-commerce stores, portfolio sites, and agency pages all work well. Any homepage with standard web sections (hero, features, testimonials, footer) produces strong results.
How is this different from a Figma template?
Figma templates are static – you still have to manually adapt them to your brand, content, and layout preferences. Wireframable generates a unique layout based on your specific brand assets and instructions every time.
Start Wireframing Your Homepage
You have seen both paths – redesigning from an existing site and building from scratch. Either way, you go from nothing to a shareable homepage wireframe in under five minutes.
Try it free → 3 free credits/month, no credit card required.