Navigation design looks simple until you actually have to do it. A navbar is just a logo, some links, and a button, right? Then the client says “we need dropdowns” and “can we do a megamenu for the product section” and “I will know what I want when I see it.”
That last one is the real problem. You are not just designing a navbar. You are trying to read someone’s mind, and every hour you spend mocking up the wrong direction is an hour you are not getting back.
This tutorial shows you how to generate a navbar wireframe or a full megamenu mockup in under five minutes using Wireframable. Give it as much or as little direction as you want, and the AI fills in the rest. Instead of spending a day on one option, you can iterate toward something the client actually likes.
Want to see the end result before reading the tutorial? Here is a megamenu mockup generated entirely with Wireframable.
The Real Problem With Navbar Design
The hard part of wireframing a navbar is not the layout. You know how navbars work. The hard part is the design direction.
Should the nav feel minimal and airy, or dense and information-rich? Does the brand call for a classic horizontal layout or something more editorial? Is the megamenu a simple two-column list, or does it need icons, descriptions, and featured content blocks? Does the client want something that looks like every SaaS navbar, or are they hoping you will surprise them with something different?
You will not know the answers until you show them options. But creating those options is the expensive part. Every direction you explore in Figma is a time investment, and most of them will get thrown out. So you play it safe, show one or two versions, and hope one of them lands.
There is a faster way to explore.
How It Works
Wireframable lets you describe what you want, feed in brand assets if you have them, and generates a styled, responsive navbar wireframe in about a minute. You can be as specific or as vague as you want. Describe every link and dropdown in detail, or just say “modern megamenu for a SaaS product” and let the AI make the design decisions.
The point is not that it replaces your design eye. The point is that it gets you to a starting point fast enough that iterating is cheap. Show the client three directions instead of one. Throw out the ones that miss and refine the one that clicks.
Here is the step-by-step.
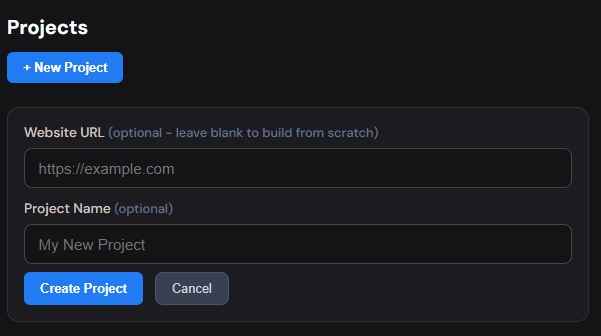
Step 1: Create a Project
Head to your Wireframable dashboard and create a new project. Give it whatever name makes sense for the client or the experiment you are running.
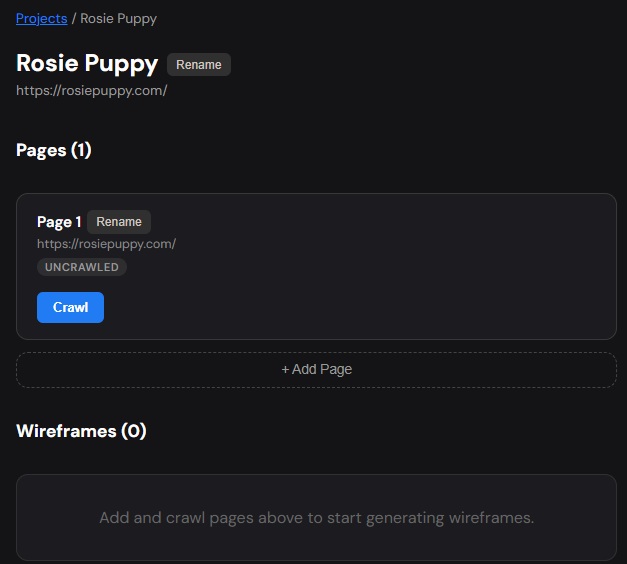
Step 2: Crawl an Existing Page (Optional)
If you are redesigning an existing site’s navigation, enter the URL and let Wireframable crawl it. This pulls in the page structure, images, colors, fonts, and content automatically. It gives the AI real context to work with instead of generating something generic.
If you are starting from scratch and do not have a reference site, skip this step entirely. You can build a navbar mockup from just a text prompt and your own brand assets.
Step 3: Pull Brand Assets
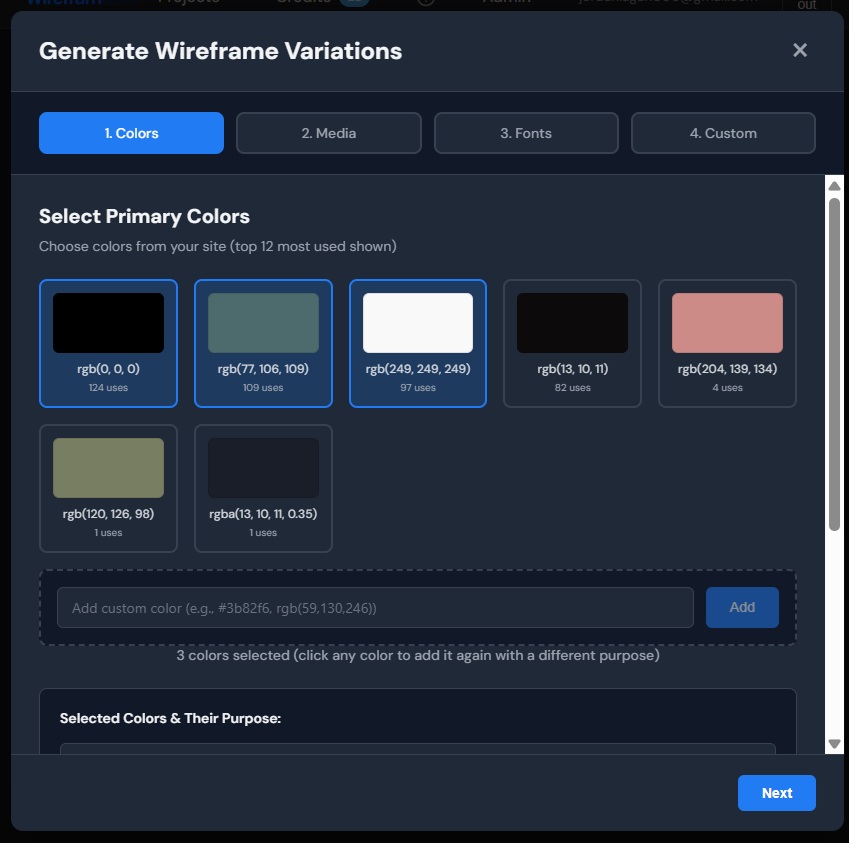
Once the crawl finishes (or if you are working from scratch), click Generate Wireframe. This opens the configuration panel where you set up the brand context.
This step is as detailed or as minimal as you want it to be. You can hand the AI a full brand kit, or give it nothing and let it come up with a design direction on its own. The more you provide, the more on-brand the output. The less you provide, the more creative freedom the AI takes.
Colors. Wireframable detects the colors from the crawled page. Select the ones that match the brand palette, or enter your own. Label them by role (primary background, text, accent) for better results. Or skip this entirely and let the AI choose a palette that complements your prompt.
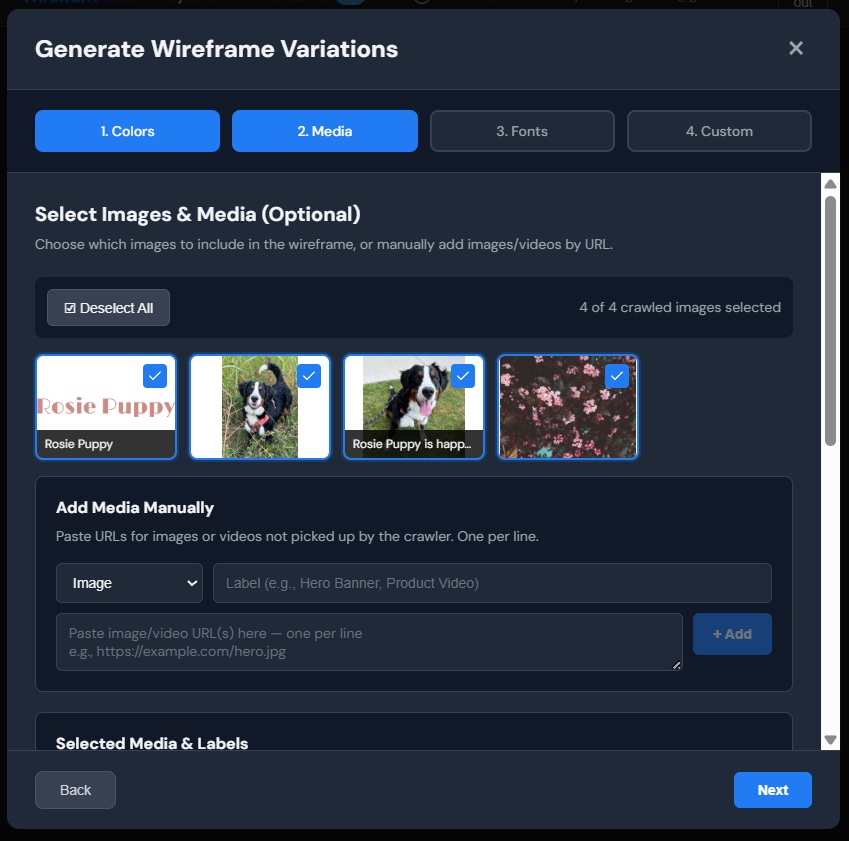
Media. Select any logos, images, or icons you want included in the navbar. If the client has a specific logo file, you can add its URL manually. Labelling assets like “logo” helps the AI place them correctly. No logo yet? The AI will use a text placeholder that is easy to swap later.
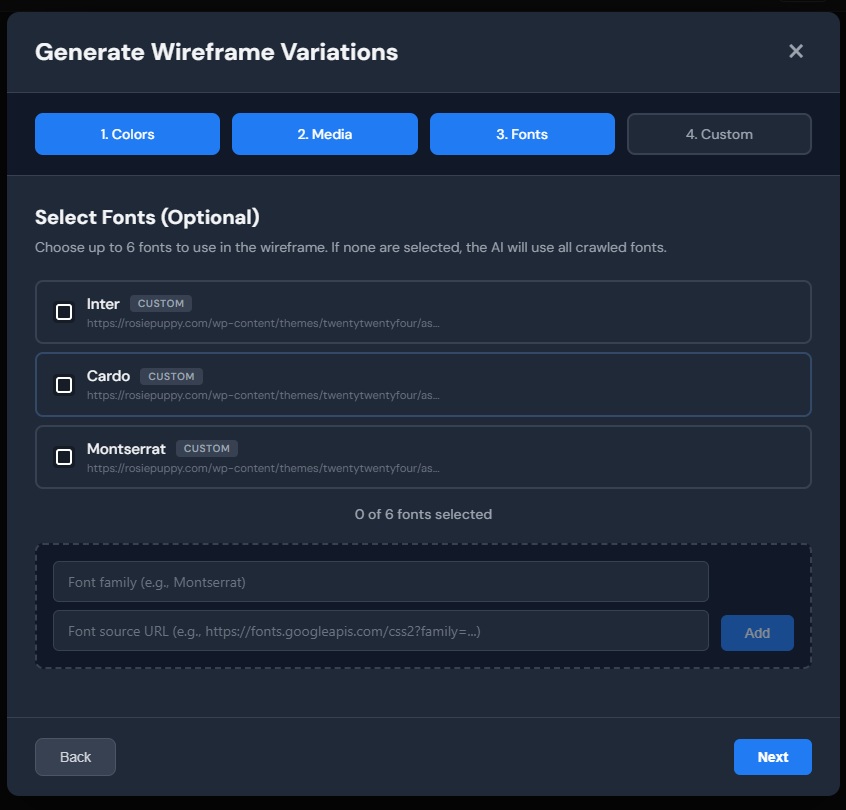
Fonts. Pick the fonts that should carry over into the wireframe. Or leave it blank and let the AI pair fonts based on the design direction it generates. Either way works.
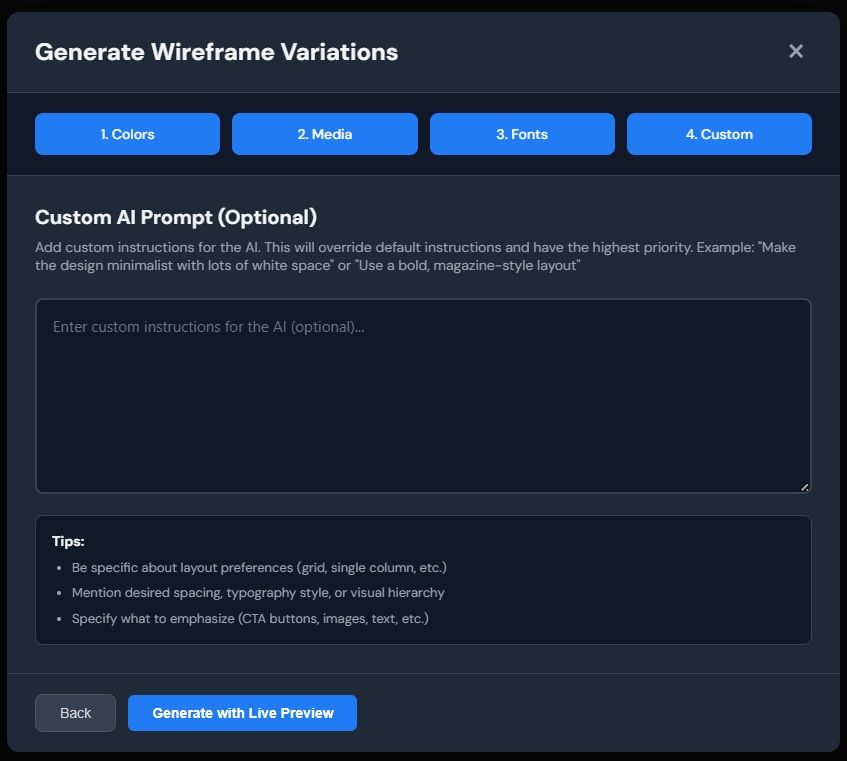
Step 4: Enter a Custom Prompt
This is where you steer the design. You can be extremely specific or deliberately open-ended depending on how much you already know about what the client wants.
When you know exactly what you need:
- “Design a horizontal navbar with the logo on the left, 5 nav links (Products, Solutions, Pricing, Resources, Company), and a ‘Get Started’ CTA button on the right. Output only the navbar.”
- “Build a megamenu navigation. Top-level items: Products, Solutions, Resources, Company. Products dropdown should have a 3-column grid with icons and descriptions for each product. Output only the navigation with the megamenu expanded.”
When you are still exploring:
- “Design a modern navbar for a SaaS analytics platform. Something that feels premium but approachable. Include a megamenu under Products. Output only the navigation.”
- “Give me 3 different navbar directions for a wellness brand. Vary the style, one minimal, one editorial, one bold. Output only the navigation components.”
When you just want to see what the AI comes up with:
- “Design a navbar. Surprise me. Output only the navigation.”
The less direction you give, the more the AI interprets on its own. That can be useful early in a project when you are fishing for a direction. Get specific once you know which way the client is leaning.
The key phrase is “output only the navbar” or “output only the navigation.” This tells the AI to focus on the nav component instead of generating a full page.
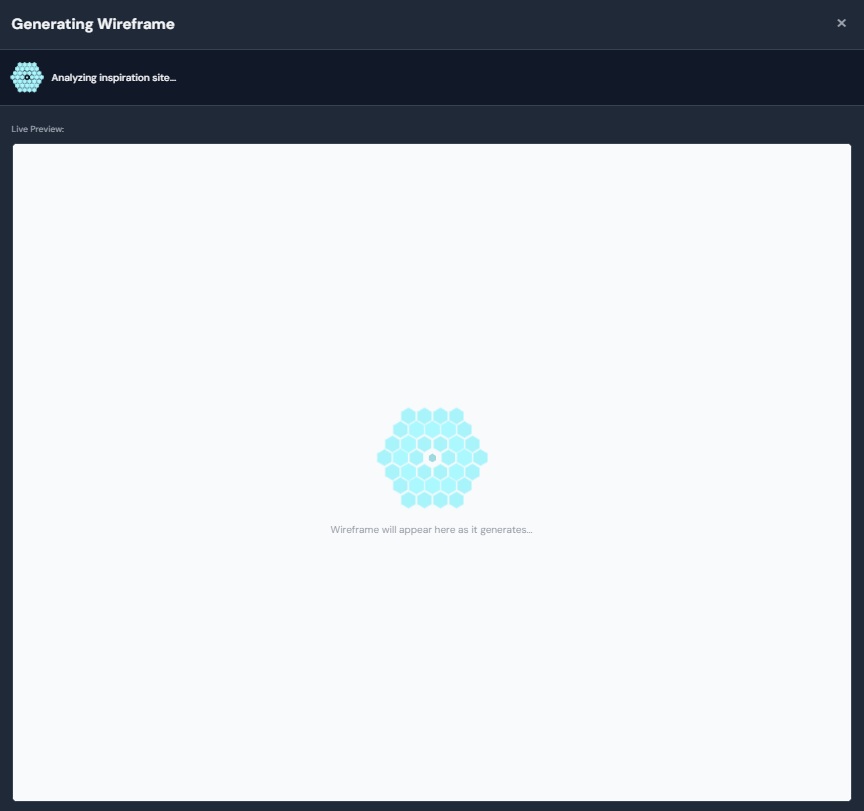
Step 5: Generate
Hit generate and watch the navbar wireframe build in real time. The AI produces clean HTML and CSS based on your brand assets and prompt. Generation takes about a minute.
That is it. Five minutes from a blank project to a styled, responsive navbar wireframe. No artboard setup, no component libraries, no guessing.
What You Can Actually Build
To give you an idea of the quality that comes out, here is a megamenu mockup generated entirely in Wireframable:
Full megamenu with dropdowns, product descriptions, icons, and a responsive mobile layout. All from a single prompt.
If It Is Not Quite Right
Not every generation nails it on the first try. That is actually the point. You are using this to find the right direction, not to ship the first thing that comes out.
Regenerate with a tighter prompt. If the layout is close but the dropdown structure needs work or the style is not quite right, tweak the prompt and run it again. Your first regeneration of each wireframe is free, and previous versions are saved so you can compare side by side.
Refine a specific piece. Instead of regenerating the whole navbar, you can target a specific element. Select the dropdown that is not working, describe what you want different, and regenerate just that section. Everything else stays the same.
Report it. If something is genuinely broken, like a dropdown that did not render or assets placed in the wrong spot, use the report button. We read every one.
Where to Go From Here
Once you have a navbar mockup that feels right:
Share it with the client. Generate a public link and send it over. Anyone can view it without logging in. No exports, no attachments, no “which version of the Figma file am I looking at” conversations.
Bring it into Figma. Screenshot the wireframe and drop it into Figma as a reference layer, or use a plugin like html.to.design to convert the HTML into editable components. Either way, you are starting from a real design direction instead of a blank artboard.
Hand it to a developer. Every wireframe is clean HTML and CSS. A developer can pull the code and start building from it directly if the project is ready to move.
Iterate. Show the client two or three directions and let them react. It is much faster to refine something they can see than to keep guessing from a verbal brief.
Frequently Asked Questions
Can I wireframe a megamenu with AI?
Yes. Describe the megamenu structure in your prompt, including top-level items and what each dropdown should contain, and Wireframable generates a fully styled megamenu mockup with columns, icons, descriptions, and responsive mobile behavior.
How much does it cost to wireframe a navbar?
Each generation costs 1 credit. Every account gets 3 free credits per month. Your first regeneration of each wireframe is free, so you can refine the output without spending an extra credit.
Do I need to provide brand assets?
No. You can provide as much or as little as you want. If you supply colors, fonts, and a logo, the output will be on-brand. If you provide nothing, the AI will invent a design direction based on your prompt alone.
Can I get the navbar wireframe into Figma?
Wireframable outputs HTML and CSS, not a native Figma file. You can take a screenshot of the wireframe and import it into Figma as a reference layer, or use a plugin like html.to.design to convert the HTML into Figma components. You can also share a public link for client review without needing Figma at all.
Can I generate just the navbar without a full page?
Yes. Add "output only the navbar" or "output only the navigation" to your prompt. This tells the AI to skip generating a full page and focus on the navigation component.
Start Generating Navbar Wireframes for Free
The navigation is the one component every stakeholder has an opinion on. The faster you can show them real options, the faster you land on the right one.
Try it free. Every account gets 3 free credits per month, no credit card required.